

DataFX 8 Tutorial 2
#DataFX
#JavaFX

As I mentioned here I started a series of [DataFX]({{ site.baseurl }}{% link pages/projects/datafx.md %}) tutorials. The first tutorial can be found here.
In this second tutorial I will show you the basics about navigation in a DataFX flow. In this example we will define two different views that are part of a flow and then navigate from one view to the other one. The source of the tutorial can be foundhere.
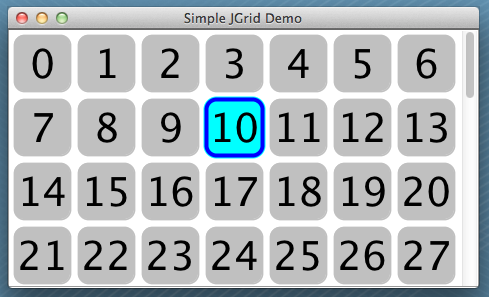
The following pictures shows the two views of the tutorial and its interaction:
As shown in the first tutorial we want to start by defining the views in FXML. Here is the FXML file for the first view:
<?import java.lang.*?>
<?import java.util.*?>
<?import javafx.geometry.*?>
<?import javafx.scene.control.*?>
<?import javafx.scene.layout.*?>
<?import javafx.scene.paint.*?>
<stackpane id="StackPane" maxheight="-Infinity" maxwidth="-1.0" minheight="-Infinity" minwidth="-Infinity" prefheight="-1.0" prefwidth="-1.0" xmlns:fx="http://javafx.com/fxml/1" xmlns="http://javafx.com/javafx/2.2">
  <children>
    <vbox alignment="CENTER" prefheight="-1.0" prefwidth="300.0" spacing="12.0">
      <children>
        <label fx:id="resultLabel" text="This is view 1">
        <button fx:id="actionButton" mnemonicparsing="false" text="Navigate to view 2">
        </button></label>
      </children>
      <padding>
        <insets bottom="12.0" left="12.0" right="12.0" top="12.0" />
      </padding>
    </vbox>
  </children>
  <padding>
    <insets />
  </padding>
</stackpane>
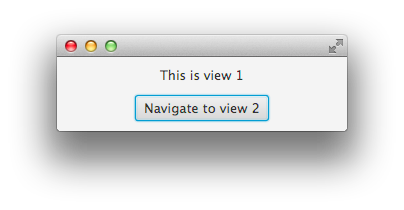
This defines a view that looks like this:
The second view differ only in a few points from the first one. Here is the FXML definition of the second view:
<?import java.lang.*?>
<?import java.util.*?>
<?import javafx.geometry.*?>
<?import javafx.scene.control.*?>
<?import javafx.scene.layout.*?>
<?import javafx.scene.paint.*?>
<stackpane id="StackPane" maxheight="-Infinity" maxwidth="-1.0" minheight="-Infinity" minwidth="-Infinity" prefheight="-1.0" prefwidth="-1.0" xmlns:fx="http://javafx.com/fxml/1" xmlns="http://javafx.com/javafx/2.2">
  <children>
    <vbox alignment="CENTER" prefheight="-1.0" prefwidth="300.0" spacing="12.0" style="-fx-background-color: red;">
      <children>
        <label fx:id="resultLabel" text="This is view 2">
          <button fx:id="actionButton" mnemonicparsing="false" text="Navigate to view 1"></button>
        </label>
      </children>
      <padding>
        <insets bottom="12.0" left="12.0" right="12.0" top="12.0" />
      </padding>
    </vbox>
  </children>
  <padding>
    <insets />
  </padding>
</stackpane>
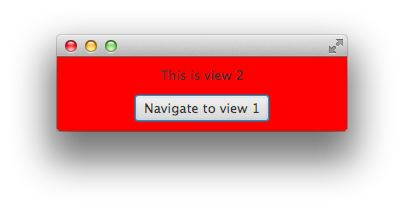
As you can see in the code there is a style addition in the VBox tag. Here the red background color of the view is defined by CSS. The rendered view will look like this:
As a next step we create view controllers for the views. As shown in the last tutorial you have to define a class for each view that acts as its controller. In a first step we create some empty controller classes that are only annotated by @FXMLController:
public class View1Controller {
    @FXML
    private Button actionButton;
}
Only the button that is defined by the fx:id attribute in the FXML file is part of the first controller class. The second one will look similar:
public class View2Controller {
    @FXML
    private Button actionButton;
}
Once this is done an application that is based on a flow can be created. As learned in tutorial 1 there is an easy way to create an application that only contains one flow. We will use it here, too. The main class of this example will look like this:
    public static void main(String[] args) {
        launch(args);
    }
    @Override
    public void start(Stage primaryStage) throws Exception {
        new Flow(View1Controller.class).startInStage(primaryStage);
    }
}
By doing so a new flow is created that defines view1 as its start view. If you start the application you will already see the first view but the button won't trigger any action. To add an action that links to the second view DataFX provides a special annotation called <@LinkAction. This annotation is working like the @ActionTrigger annotation that was introduced in tutorial 1. Once the button is clicked an action event will be fired and handled by the DataFX container. When using the @LinkAction annotation the controller of the target view must be specified. Therefore the Annotations provides a value that can be defined as the controller class. Here is the updated code of the first controller class:
public class View1Controller {
    @FXML
    @LinkAction(View2Controller.class)
    private Button actionButton;
}
Whenever the button is pressed the flow will navigate to the second view that is defined by the View2Controller class. The @LinkAction can be added to any JavaFX Node. If the component extends the ButtonBase class or the MenuItem class a handler for action events will be added to the control. Otherwise the action will be called once the control is clicked by mouse. By using the annotation a developer doesn't need to handle the complete navigation like changing the view or create a new data model. DataFX will handle all these steps automatically and the defined view will appear on screen once the action is triggered.
Maybe you can already imagine how the final code for the second view controller will look like ;)
public class View2Controller {
    @FXML
    @LinkAction(View1Controller.class)
    private Button actionButton;
}
Once this is done you have created the first simply flow with DataFX. By using the @LinkAction annotation you can create big flows that contain a lot different views. In later tutorials you will that DataFX provides some other cool features to manage the navigation in a flow.
As said in the first example each action in DataFX is defined by an unique ID. In the case of a LinkAction, the developer doesn't need to define an ID on its own. DataFX will create a unique ID once the controller will be initialized. By doing so the source code is much shorter and cleaner. As you will see later in the tutorials there are several other ways to define a navigation in a flow. Some of these work with an unique ID as shown in tutorial 1.